- Published on
Using external authentication providers and JWT Tokens with Umbraco members
- Authors

- Name
- Andrew McKaskill
- @andrewmckaskill

Table of Contents
- Where it all began
- Step 0 - Setup Demo Site and Authentication Provider
- Create Auth0 Account
- Create a new Umbraco instance
- Update settings
- Add Login Templates and Test API Controller
- Step 1 - External Login Provider
- Add the Auth0.AspNetCore.Authentication package to your Umbraco project.
- Add the code below to configure your Auth0 authentication provider. Update the clientId and domain options.
- Add a composer class to your site to register the authentication method:
- Run your application.
- Step 2. Add a JWT Bearer token authentication middleware
- Add standard AspNetCore JWTBearerAuthentication middleware
- Instantiate the new middleware:
- Update the composer
- (Optional) Add Security Schemes to Swagger
- Update our test controller:
- Test it
- The Results
- Step 3 - Change the Default Authentication Scheme
- Summary
Where it all began
This issue started off with me needing to find a way to associate an umbraco form submission (which was happening headlessly using the Umbraco Forms Delivery API) with one of my users.
Umbraco Forms will automatically associate a form submission with a member if the current HttpContext.User is an Umbraco member, but we weren't using standard Umbraco member login methods. Our site is running headlessly, using an external authentication provider to restrict access to the site, and JWT tokens to authenticate to our custom REST APIs.
So how do we get Umbraco forms to think of our users as members?
Add an External Login provider
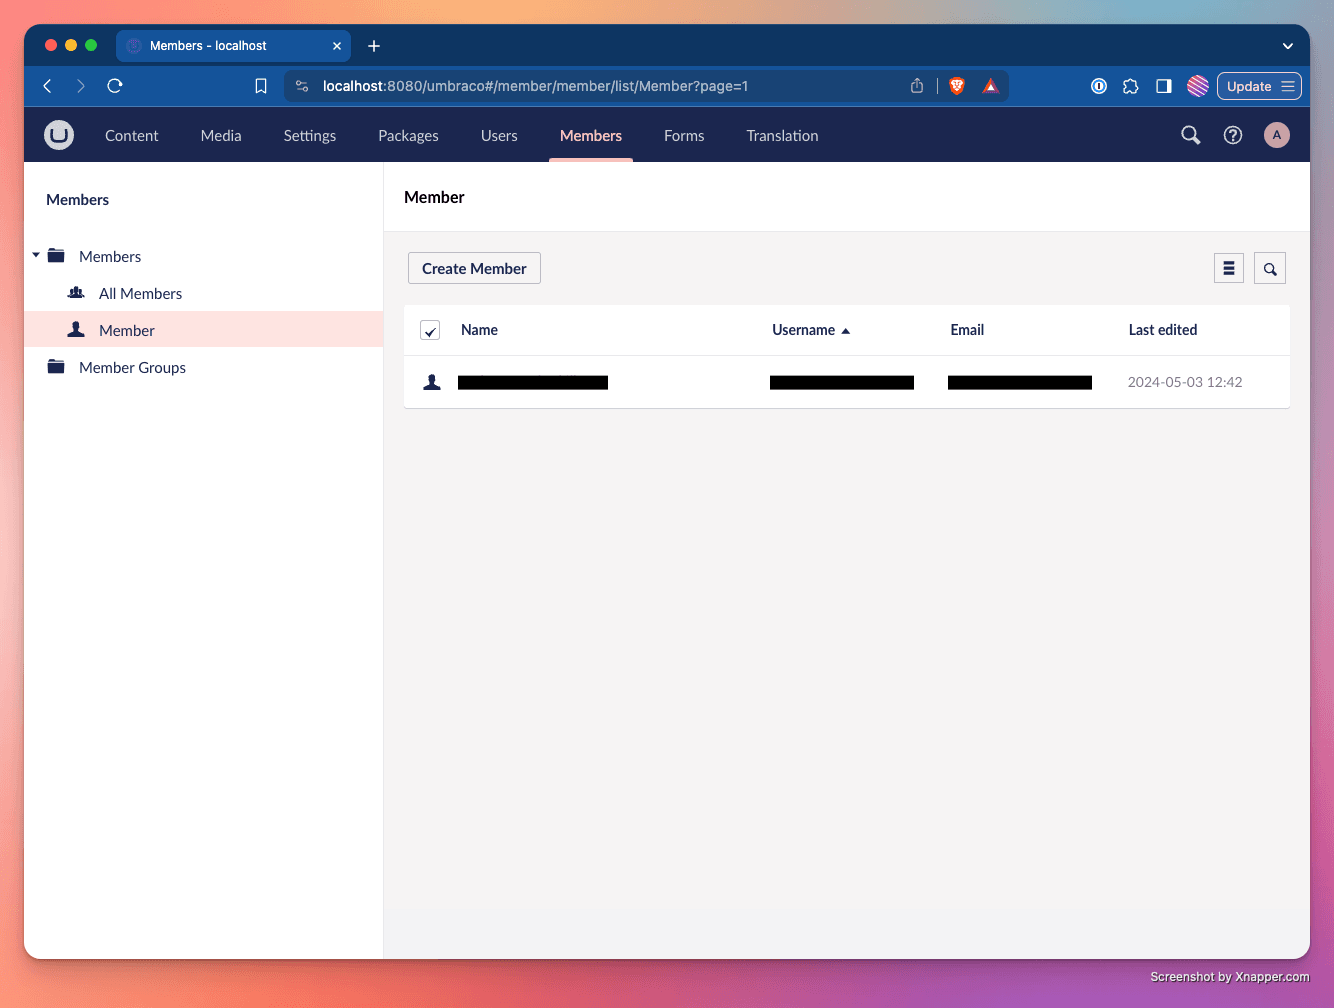
In order for our users to be recognized by Umbraco and all its components, they need to exist as Umbraco members. Using the External login provider built-in to Umbraco allows us an easy way of auto-creating and linking our external users with Umbraco members.
Why isn't just setting up an external login provider sufficient? Because Umbraco doesn't actually use that authentication provider to authenticate every request. Instead, the external login provider process (which uses asp.net identity) follows these steps:
- Validates your external token (which may involve network requests back to the provider)
- Finds your linked member account
- Updates your current request with a new
ClaimsPrincipalbased on your Umbraco member data - Issues you a local cookie-based authentication ticket
- Signs you out of your external provider
The local authentication ticket is then used on all subsequent requests, minimizing further network traffic to the external providers and providing all other parts of your code a single, consistent user object.
That means that, although we might use a JWT token from our external provider DURING the "swap" process, it isn't used after that.
Add JWT bearer token middleware
This step creates a middleware processor that runs the same first three steps of the external login process outlined above, but doesn't issue a new authentication ticket. Instead it just keeps our Umbraco member linked to the current request in memory.
This works great for any custom API controllers we have as we can add an
[Authorize]attribute on them to force our alternate middleware to be evaluated.Configure default authentication scheme
The final step is to re-configure Umbraco's built-in authentication middleware to ALSO run our JWT Bearer middleware.
The code for this blog post is available here for reference.
Step 0 - Setup Demo Site and Authentication Provider
For this demo I've used Auth0 as an Identity provider. They have a free tier which you can use for development and support lots of different options, including OIDC, OAuth2, and JWT tokens.
Create Auth0 Account
First, sign up for an Auth0 account and create an application, using the "Regular Web Applications" template.
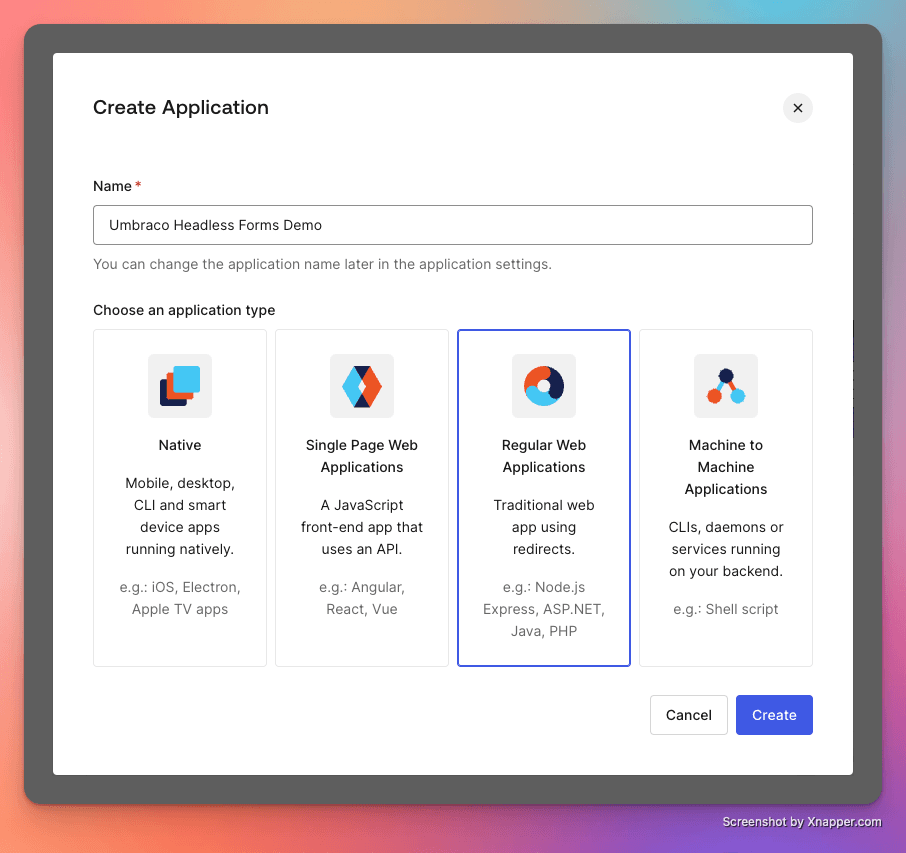
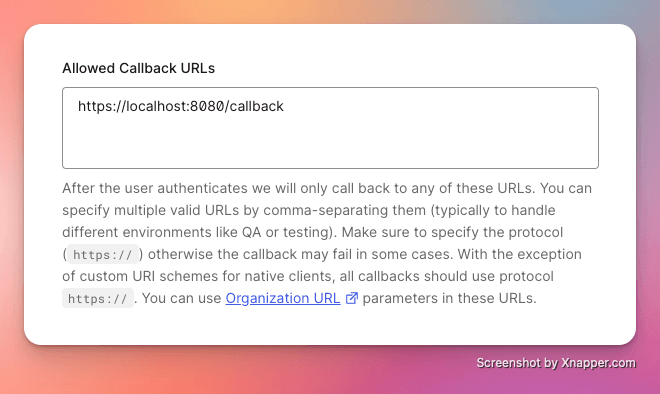
Once the application is created, go to the settings and add the following to the "Allowed Callback Urls" section: - https://localhost:8080/callback - https://localhost:8080/umbraco/swagger/oauth2-redirect.html
Change the
localhost:8080to match the port your local Umbraco is running on.
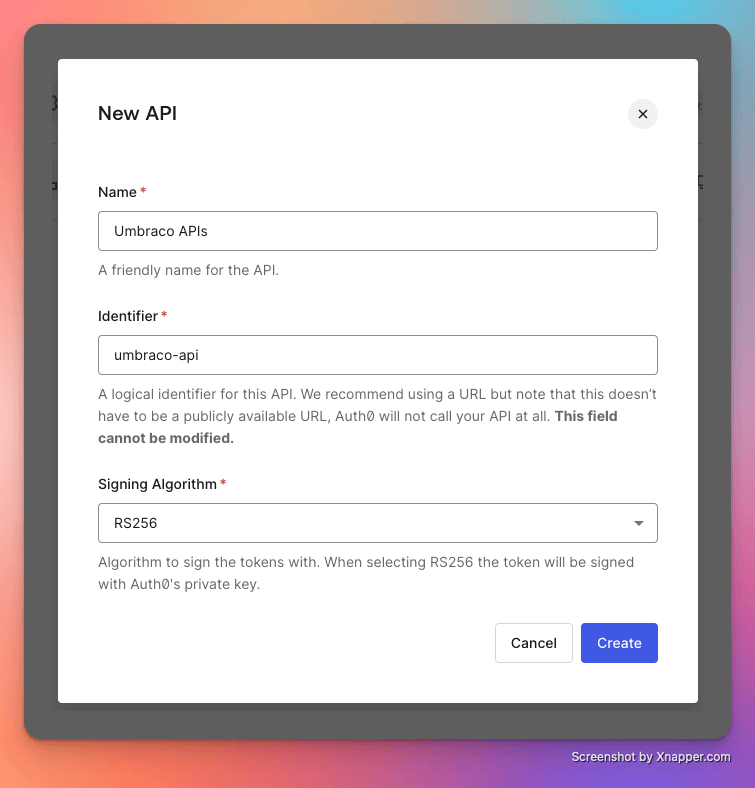
Also create a new API (this is required to get a JWT-based access token), using the identifier umbraco-api.
Create a new Umbraco instance
For this demo I'm using Paul Seal's excellent Clean Starter Kit, which requires only a super small number of commands to get up and running.
dotnet new sln --name headless-forms-authentication-demo

dotnet new umbraco -n headless-forms-authentication-demo --friendly-name "Administrator" --email "admin@example.com" --password "1234567890" --development-database-type SQLite

dotnet sln add headless-forms-authentication-demo

dotnet add headless-forms-authentication-demo package clean
Update settings
Don't forget to update the following settings:
Enable delivery API
Add the following to appSettings.json:
"Umbraco": {
  "CMS": {
    "DeliveryApi": {
      "Enabled": true
    }
  }
}
Change the startup port to 8080 (this makes it easier to associate with the external provider)
Update
properties/launchSettings.json:
 "profiles": {
   "Umbraco.Web.UI": {
     "commandName": "Project",
     "dotnetRunMessages": true,
     "launchBrowser": true,
     "applicationUrl": "https://localhost:8080",
   }
 }
I also enabled .net user secrets at this point so my external authentication clientId and clientSecret aren't checked into my repo.
dotnet user-secrets init
dotnet user-secrets set Auth0:Domain YOUR_AUTHO_DOMAIN
dotnet user-secrets set Auth0:ClientId YOUR_AUTH0_CLIENTID
dotnet user-secrets set Auth0:Authority "https://YOUR_AUTH0_DOMAIN"
dotnet user-secrets set Auth0:Audience umbraco-api
Add Login Templates and Test API Controller
To test each step of our changes we need to be able to log in normally first. Let's add the relevant macros, templates and pages, as per the Member registration and login tutorial on the Umbraco docs site
Add a
Loginpartial view macro file, from the built-inLoginsnippet.Add a
LoginStatuspartial view macro file, from the built-inLogin Statussnippet. I extended mine to call theLoginmacro if not logged in so that I only have to reference a single macro.In
/Views/MacroPartials/LoginStatus.cshtml:@if (isLoggedIn) { ... } else { @await Umbraco.RenderMacroAsync("Login") }Add a new page called
Loginusing the Content document type. Add a single Rich text block and add theLoginStatusmacro to it.
As we want to test this headlessly, we should also add an API controller. Here's a really simple one that will report back if we are logged in or not:
Add
Controllers/TestController.cs:using Microsoft.AspNetCore.Mvc; using Umbraco.Cms.Web.Common.Controllers; namespace headless_forms_authentication_demo.Controllers; [ApiExplorerSettings(GroupName = "Test")] public class TestController : UmbracoApiController { [HttpGet, Route("/api/test/getMemberDetails")] public IActionResult GetMemberDetails() { if (User?.Identity?.IsAuthenticated ?? false) { return Ok($"Logged in as {User.Identity.Name}"); } return new UnauthorizedObjectResult("Not authorized"); } }This will be available on the following url:
https://localhost:8080/api/test/getmemberdetailsYou may also notice that I included the
ApiExplorerSettings,HttpGet, andRouteattributes. These are required for the method to show up in our Swagger document. If you don't include them the api will still be created an available through Umbraco's auto-routing system, but because that's an Umbraco feature rather than a dotnet feature, swagger won't see them.
Step 1 - External Login Provider
The first step is to configure an Umbraco "external" login provider, and set it up to auto-link (and auto-create) members.
The process is detailed on the following pages in the Umbraco docs:
- The External login providers page details how to use external login providers and how to configure them.
- The How to use external identity providers section of the Delivery API has a detailed example for setting up an external provider for Github.
To get external logins with Auth0 working, you need to follow these steps:
Add the Auth0.AspNetCore.Authentication package to your Umbraco project.
dotnet add headless-forms-authentication-demo package Auth0.AspNetCore.Authentication
Add the code below to configure your Auth0 authentication provider. Update the clientId and domain options.
(This code is based on the sample in the Umbraco Delivery API docs site)
Add Authentication/Auth0AuthenticationExtensions.cs:
using Auth0.AspNetCore.Authentication;
using Microsoft.AspNetCore.Authentication.OAuth;
using Microsoft.AspNetCore.Authentication.OpenIdConnect;
using Microsoft.Extensions.Options;
using Umbraco.Cms.Core;
using Umbraco.Cms.Web.Common.Security;

namespace headless_forms_authentication_demo.Authentication;

public static class Auth0AuthenticationExtensions
{
    private const string Scheme = "Auth0";

    public static IUmbracoBuilder AddAuth0MemberAuthentication(this IUmbracoBuilder builder)
    {
        builder.Services.ConfigureOptions<Auth0MemberExternalLoginProviderOptions>();

        builder.AddMemberExternalLogins(logins =>
        {
            logins.AddMemberLogin(
                membersAuthenticationBuilder =>
                {
                    membersAuthenticationBuilder.AddAuth0WebAppAuthentication(
                        membersAuthenticationBuilder.SchemeForMembers(Scheme),
                        options =>
                        {
                            // add your client ID and secret here
                            options.Domain = builder.Config["Auth0:Domain"];
                            options.ClientId = builder.Config["Auth0:ClientId"];
                            options.Scope = "openid profile email";
                            options.SkipCookieMiddleware = true;

                        });
                });
        });

        return builder;
    }

    private class Auth0MemberExternalLoginProviderOptions : IConfigureNamedOptions<MemberExternalLoginProviderOptions>
    {
        public void Configure(string? name, MemberExternalLoginProviderOptions options)
        {
            if (name is not $"{Constants.Security.MemberExternalAuthenticationTypePrefix}{Scheme}")
            {
                return;
            }

            Configure(options);
        }

        public void Configure(MemberExternalLoginProviderOptions options)
            => options.AutoLinkOptions = new MemberExternalSignInAutoLinkOptions(
                autoLinkExternalAccount: true,
                defaultCulture: null,
                defaultIsApproved: true,
                defaultMemberTypeAlias: Constants.Security.DefaultMemberTypeAlias);
    }
}
Add a composer class to your site to register the authentication method:
Add Composers/AuthenticationComposer.cs:
using headless_forms_authentication_demo.Authentication;
using Umbraco.Cms.Core.Composing;

namespace headless_forms_authentication_demo.Composers;

public class AuthenticationComposer : IComposer
{
    public void Compose(IUmbracoBuilder builder)
    {
        builder.AddAuth0MemberAuthentication();
    }
}
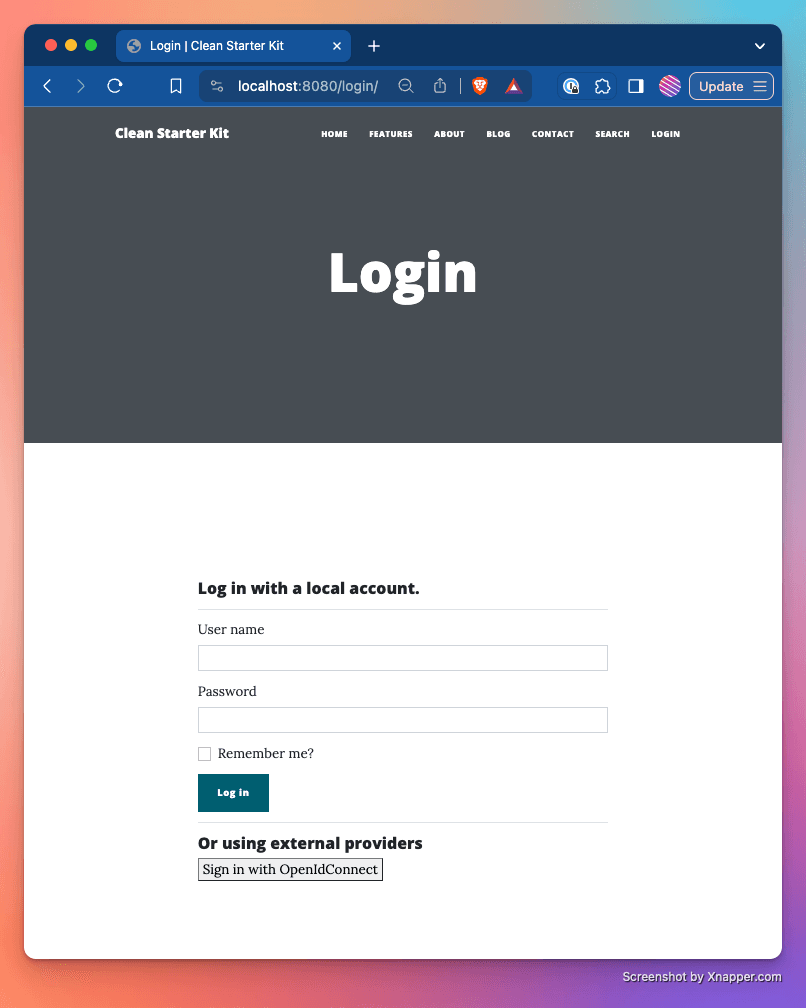
Run your application.
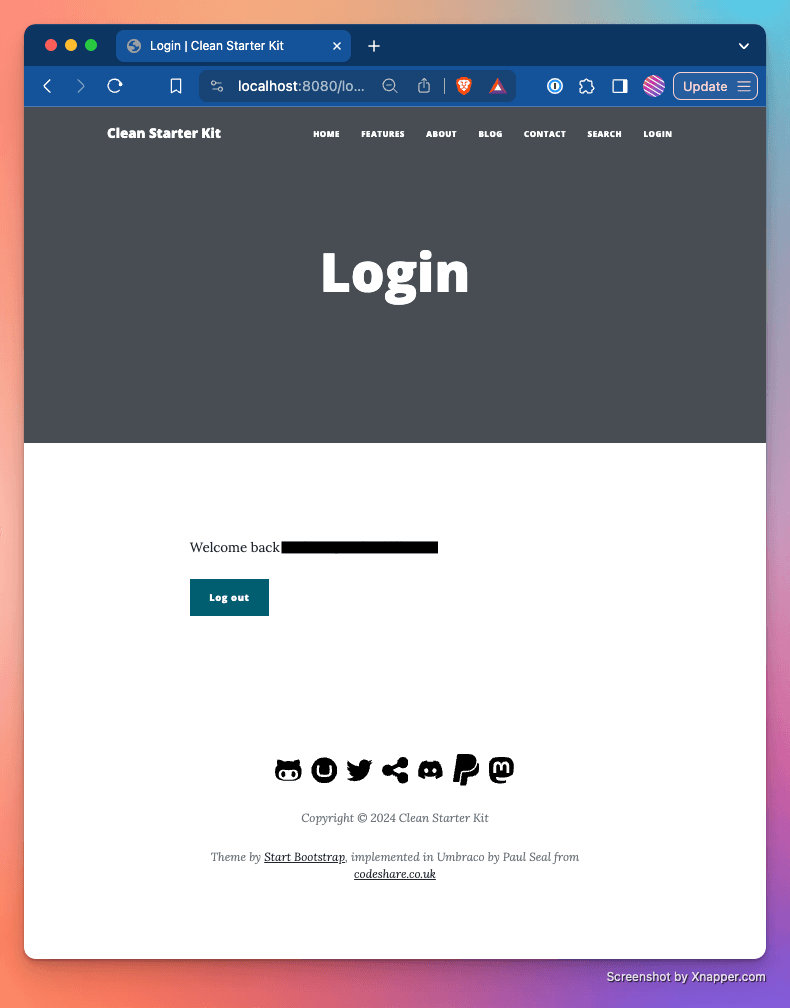
You should now be able to test your login process on the server-rendered website. Here's what it looks like on our demo site:
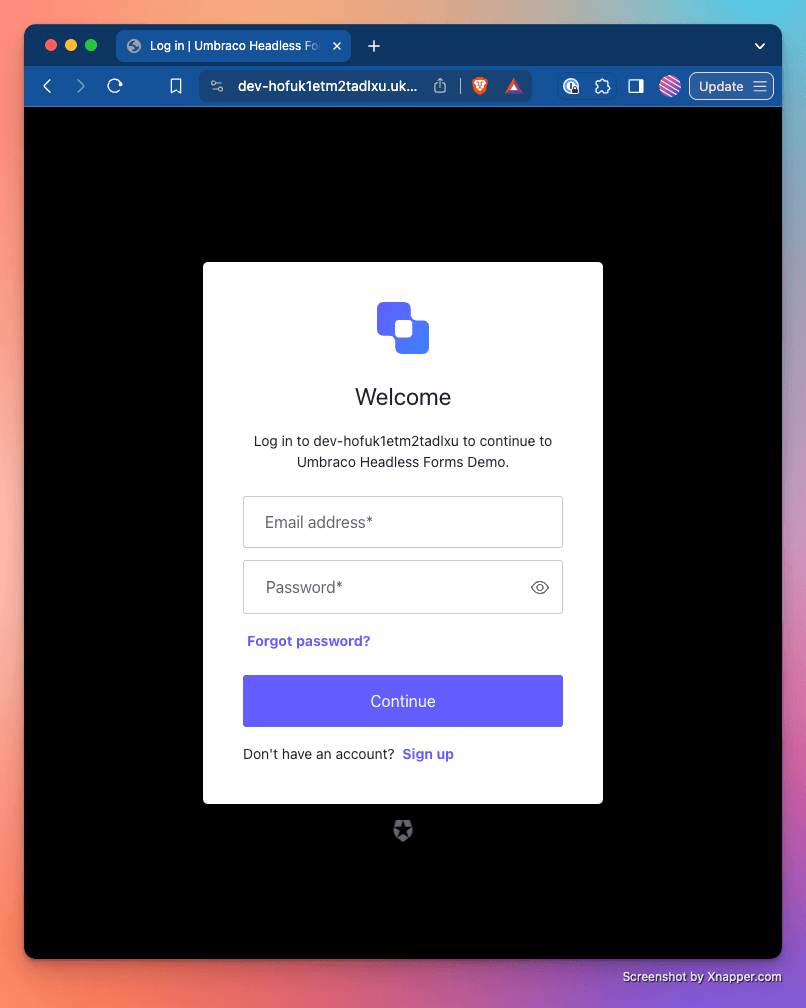
If you go directly to the GetMemberDetails url (https://localhost:8080/api/test/getmemberdetails) in your browser or call the API from the Swagger UI page (https://localhost:8080/umbraco/swagger) it will use your AspNet session cookie.
If you access it directly using Postman (or in an Incognito window) you'll notice it comes back Unauthorized. To confirm that it's the cookie that's maintaining your login state you can open Dev Tools in your browser and copy the .AspNetCore.Identity.Application cookie over to postman.
Step 2. Add a JWT Bearer token authentication middleware
Add standard AspNetCore JWTBearerAuthentication middleware
dotnet add package Microsoft.AspNetCore.Authentication.JwtBearer
Instantiate the new middleware:
Add Authentication/Auth0JWTExtensions.cs:
 using System.Security.Claims;
 using Microsoft.AspNetCore.Authentication.JwtBearer;
 using Microsoft.AspNetCore.Identity;
 using OpenIddict.Abstractions;
 using Umbraco.Cms.Core;
 using Umbraco.Cms.Web.Common.Security;

 namespace headless_forms_authentication_demo.Authentication;

 public static class Auth0JWTExtensions
 {
     public const string Auth0JWTBearerSchemeName = "Auth0JWTBearer";

     public static IUmbracoBuilder AddAuth0MemberJWTBearerAuthentication(this IUmbracoBuilder builder)
     {
         // Add an additional scheme to do
         builder.Services.AddAuthentication()
             .AddJwtBearer(
                 Auth0JWTBearerSchemeName,
                 options =>
                 {
                     options.Authority = builder.Config["Auth0:Authority"];
                     options.MapInboundClaims = true;
                     options.TokenValidationParameters.ValidateAudience = false;

                     options.Events = new JwtBearerEvents()
                     {
                         OnTokenValidated = async (ctx) =>
                         {
                             /* The following claims are needed, in this order:
                             *
                             * 1. NameIdentifier - ALWAYS required
                             *    Used in the database to link the external user and the umbraco member
                             *
                             * 2. Email - required for auto-LINK and auto-CREATE
                             *    Used to find an umbraco member if no link exists
                             *
                             * 3. Name - required for auto-CREATE
                             *    Used to create a new umbraco member if no member found and auto-CREATE
                             *    is turned on
                             *
                             * If these claims don't exist or other claims do, you can re-map them here.
                             */
                             var providerUserId = ctx.Principal?.FindFirstValue(ClaimTypes.NameIdentifier);
                             var email = ctx.Principal?.FindFirstValue(ClaimTypes.Email);
                             var name = ctx.Principal?.FindFirstValue(ClaimTypes.Name);
                             if (String.IsNullOrEmpty(providerUserId) ||
                                 String.IsNullOrEmpty(email) ||
                                 String.IsNullOrEmpty(name))
                             {
                                 ctx.Fail("Required claims missing from external provider details");
                                 return;
                             }

                             // create the external login info for the member external login scheme
                             var loginInfo = new ExternalLoginInfo(ctx.Principal,
                                 Constants.Security.MemberExternalAuthenticationTypePrefix +
                                 Auth0AuthenticationExtensions.Scheme,
                                 providerUserId,
                                 "Member Auth0");

                             // get a reference to umbraco's sign in manager
                             var memberSignInManager =
                                 ctx.HttpContext.RequestServices.GetRequiredService<IMemberSignInManager>();

                             // try to sign the user in based on the ExternalLoginInfo we created above
                             // if successful, the new Umbraco principal will be available on the current httpContext
                             var result = await memberSignInManager.ExternalLoginSignInAsync(loginInfo, false, true);
                             if (result != SignInResult.Success)
                             {
                                 ctx.Fail("Unable to sign user in");
                                 return;
                             }

                             // Set the CONTEXT principal to the umbraco principal created during externalLoginSignIn.
                             // The HttpContext will be overwritten with the principal from the event's context
                             // once the event is complete.
                             ctx.Principal = ctx.HttpContext.User;
                         },
                     };

                 });

         return builder;
     }
 }
Update the composer
In Composers/AuthenticationComposer.cs:
builder.AddAuth0MemberAuthentication()
        .AddAuth0MemberJWTBearerAuthentication();
(Optional) Add Security Schemes to Swagger
To make our testing lives easier, we can update Umbraco's built in Swagger UI and Swagger generation to include our security requirements. This will allow us to do a request a new logon token and pass the token to our APIs directly from the Swagger UI page.
Updating the swagger involves a few steps. First we need a DocumentFilter to add the actual security requirement to the OpenAPI document itself.
Add Authentication/SwaggerOAuthAuthorizationDocumentFilter.cs:
using Microsoft.OpenApi.Models;
using Swashbuckle.AspNetCore.SwaggerGen;

namespace headless_forms_authentication_demo.Authentication;

public class SwaggerOAuthAuthorizationDocumentFilter : IDocumentFilter
{
    private readonly string _documentName;
    private readonly Uri _authorizeUri;
    private readonly Uri _tokenUri;

    public SwaggerOAuthAuthorizationDocumentFilter(
        string documentName,
        string authorizeUrl,
        string tokenUrl)
    {
        _documentName = documentName;

        _authorizeUri = new Uri(authorizeUrl);
        _tokenUri= new Uri(tokenUrl);

    }

    public void Apply(OpenApiDocument swaggerDoc, DocumentFilterContext context)
    {
        if (context.DocumentName != _documentName)
            return;

        var oauthSecurityScheme = new OpenApiSecurityScheme()
        {
            Name = "oauth",
            Type = SecuritySchemeType.OAuth2,

            Flows = new OpenApiOAuthFlows()
            {

                AuthorizationCode = new OpenApiOAuthFlow()
                {
                    AuthorizationUrl = _authorizeUri,
                    TokenUrl = _tokenUri,
                    Scopes = new Dictionary<string, string>
                    {
                        { "openid", "openid" },
                        { "profile", "profile"}
                    }
                }
            }
        };

        swaggerDoc.Components.SecuritySchemes.Add(oauthSecurityScheme.Name, oauthSecurityScheme);
        swaggerDoc.SecurityRequirements.Add(new OpenApiSecurityRequirement()
        {
            {
                new OpenApiSecurityScheme()
                {
                    Reference = new OpenApiReference()
                    {
                        Type = ReferenceType.SecurityScheme,
                        Id = oauthSecurityScheme.Name
                    }
                },
                new string[] { "openid" }
            }
        });
    }
}
To tell Umbraco to run these document filters when it generates the OpenAPI document we also need a PipelineFilter:
In Composers/SwaggerPipelineFilter.cs:
using Microsoft.AspNetCore.Builder;
using Microsoft.Extensions.DependencyInjection;
using Swashbuckle.AspNetCore.SwaggerGen;
using Swashbuckle.AspNetCore.SwaggerUI;
using Umbraco.Cms.Api.Common.OpenApi;

namespace headless_forms_authentication_demo.Composers;

public class SwaggerPipelineFilter : SwaggerRouteTemplatePipelineFilter
{
    private const string ApiName = "API";
    private readonly string _clientId;
    private readonly string _authorizeUrl;
    private readonly string _tokenUrl;

    public SwaggerPipelineFilter(
        string clientId,
        string audience,
        string authorizeUrl,
        string tokenUrl) : base(ApiName)
    {
        _clientId = clientId;
        _audience = audience;
        _authorizeUrl = authorizeUrl;
        _tokenUrl = tokenUrl;
    }

    protected override void SwaggerUiConfiguration(SwaggerUIOptions swaggerUiOptions, SwaggerGenOptions swaggerGenOptions,
        IApplicationBuilder applicationBuilder)
    {
        base.SwaggerUiConfiguration(swaggerUiOptions, swaggerGenOptions, applicationBuilder);

        swaggerUiOptions.OAuthClientId(_clientId);
        swaggerUiOptions.OAuthAdditionalQueryStringParams(new Dictionary<string, string>()
         {
             {"audience", _audience}
         });
        swaggerGenOptions.DocumentFilter<Authentication.SwaggerOAuthAuthorizationDocumentFilter>(
            "default",
            _authorizeUrl,
            _tokenUrl
        );

    }
}
And finally we need to register the pipeline filter in the Umbraco Pipeline. We can do this by adding the following to our authentication composer.
In Composers/AuthenticationComposer.cs, add:
 using Microsoft.AspNetCore.Mvc;
 using Umbraco.Cms.Api.Common.OpenApi;
 using Umbraco.Cms.Web.Common.ApplicationBuilder;
and
string clientId = builder.Config["Auth0:ClientId"] ?? "";
string audience = builder.Config["Auth0:Audience"] ?? "";
string authorizeUrl = $"{builder.Config["Auth0:Authority"]}/authorize";
string tokenUrl = $"{builder.Config["Auth0:Authority"]}/oauth/token";

builder.Services.Configure<UmbracoPipelineOptions>(options =>
{
    options.PipelineFilters.RemoveAll(filter => filter is SwaggerRouteTemplatePipelineFilter);
    options.AddFilter(new SwaggerPipelineFilter(clientId,audience,authorizeUrl,tokenUrl));
});
Update our test controller:
Let's also finish off by updating our test controller by adding an additional method to test the JWT bearer tokens. This method has the added Authorize attribute which forces the authentication process to check a specific policy only.
using headless_forms_authentication_demo.Authentication;
using Microsoft.AspNetCore.Authorization;
using Microsoft.AspNetCore.Mvc;
using Umbraco.Cms.Web.Common.Controllers;

namespace headless_forms_authentication_demo.Controllers;

[ApiExplorerSettings(GroupName = "Test")]
public class TestController : UmbracoApiController
{
    [HttpGet, Route("/api/test/getMemberDetails")]
    public IActionResult GetMemberDetails()
    {
        if (User?.Identity?.IsAuthenticated ?? false)
        {
            return Ok($"Logged in as {User.Identity.Name}");
        }

        return new UnauthorizedObjectResult("Not authorized");

    }

    [Authorize(AuthenticationSchemes = Auth0JWTExtensions.Auth0JWTBearerSchemeName)]
    [HttpGet, Route("/api/test/getMemberDetailsJWT")]
    public IActionResult GetMemberDetailsJWT()
    {
        if (User?.Identity?.IsAuthenticated ?? false)
        {
            return Ok($"Logged in as {User.Identity.Name}");
        }

        return new UnauthorizedObjectResult("Not authorized");

    }
}
Test it
Here are two ways to test our APIs - one in Postman and one using Swagger UI.
When testing, make sure to try the GetMemberDetails API first, or to clear your cookies between attempts.
In Postman
You can request a new JWT token in Postman by configuring the following authentication settings on the collection:
- Type: OAuth 2.0
- Grant Type: Authorization Code (with PKCE)
- Callback URL:
https://localhost:8080/umbraco/sign-in - Auth URL:
https://YOUR_AUTH0_DOMAIN/authorize - Access Token URL:
https://YOUR_AUTH0_DOMAIN/oauth/token - Client ID:
YOUR_CLIENT_ID - Client Secret:
YOUR_CLIENT_SECRET
If you request an access token with just those parameters you will get an access token, but it won't be a JWT token, it'll be a reference based one. To validate a reference token you have to call the OAuth Introspection endpoint, and use the IdentityModel.AspNetCore.OAuth2Introspection package.
To get Auth0 to return a JWT token, you need to include an "Audience" in the auth request:
- Audience:
umbraco-api
Once you have your JWT token, make a call to the GetMemberDetails and GetMemberDetailsJWT APIs with the bearer token.
Make sure you test the GetMemberDetails API first or clear your cookies in between calls.
In Swagger UI
Go to the Swagger UI page, located at https://localhost:8080/umbraco/swagger.
Click on the "Authorize" button at the top of the page:
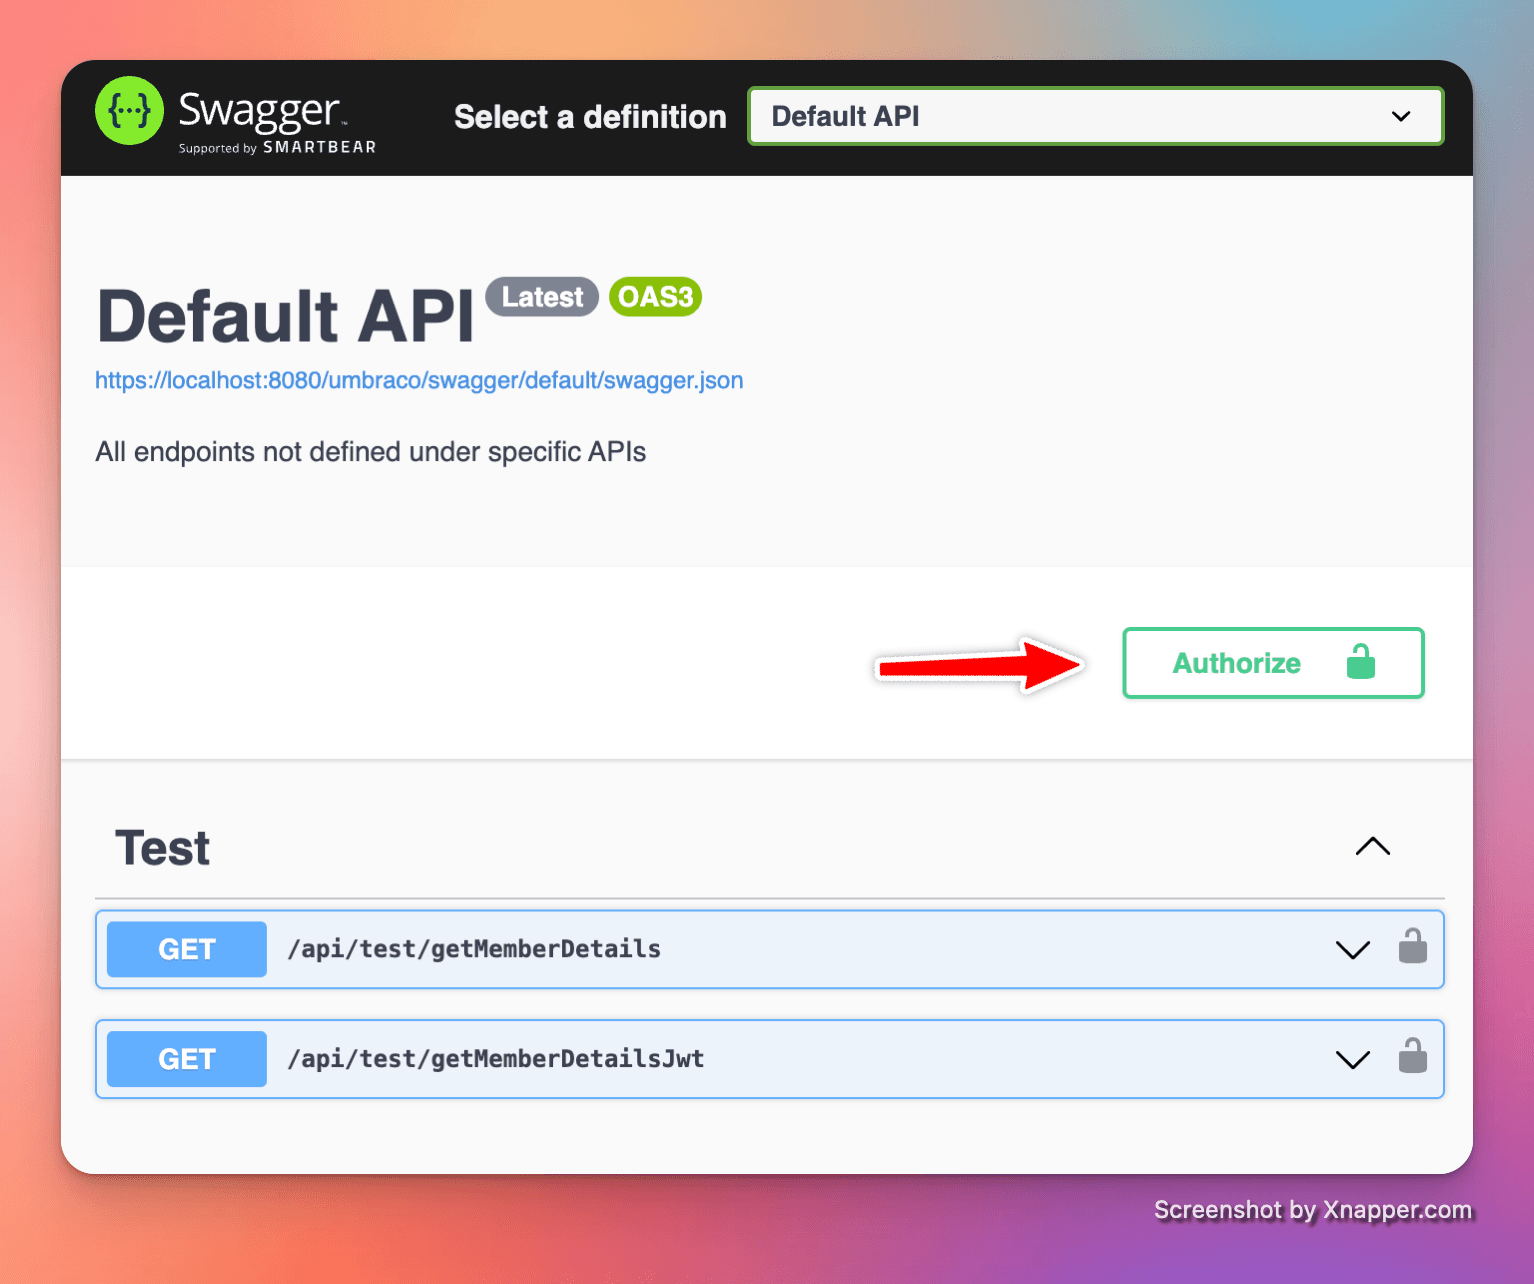
That will pop-up a dialog to configure the OAuth request. It should be pre-populated with the ClientId for us:
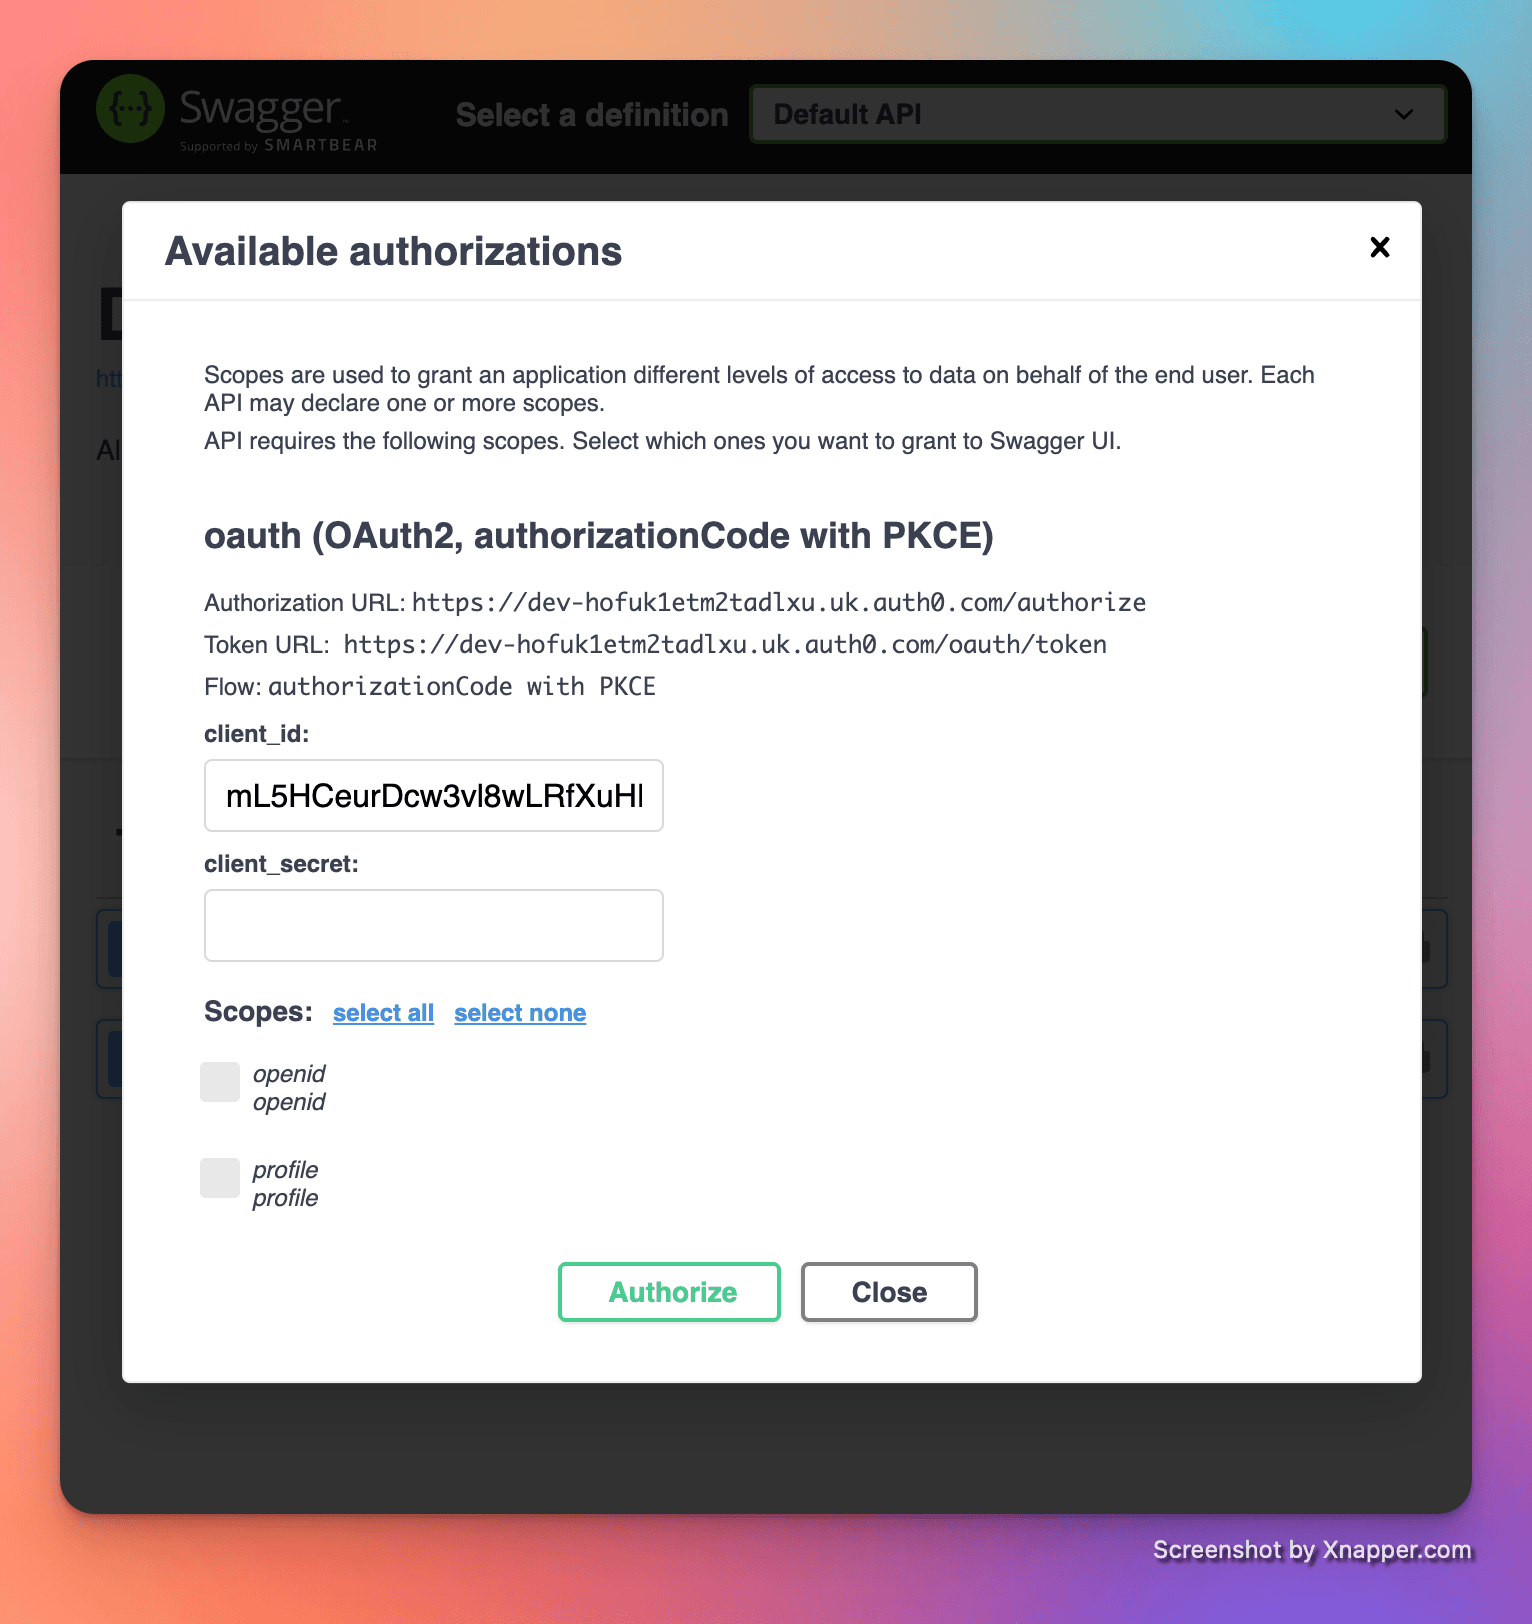
When you click "Authorize" Swagger UI will start the OAuth process with Auth0. Enter your Auth0 logon details and you should be logged in. (Note: You might get asked to confirm that our application will receive your details if this the first time you've logged on.)
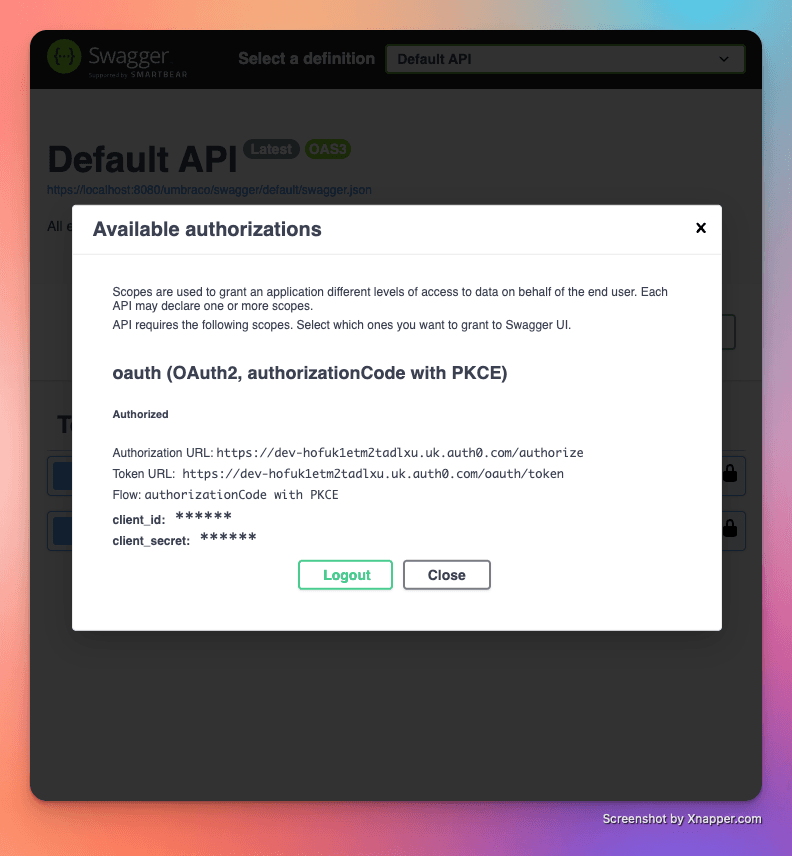
Close the dialog and you should be able to execute each API by expanding each API, clicking "Try It Out" and then "Execute" in turn.
Make sure to call the GetMemberDetails API first or clear you cookies in between calls.
The Results
If you've done all of the above you should've had the following results:
- First API call to
GetMemberDetails- 401 UNAUTHORIZED - Second API call to
GetMemberDetailsJWT- OK 200
If you went back and tried the GetMemberDetails again without clearing your cookies it would now have returned a 200 OK.
This is because the GetMemberDetailsJWT method completes the swap we talked about earlier and signs you into the standard Umbraco authentication scheme. That scheme issues you with a cookie, which is then valid an available when calling the GetMemberDetails API.
Step 3 - Change the Default Authentication Scheme
If you've been following along with this blog post you may been wondering when I were going to get to the point.
Well, the entire blog post up until this point has really just been setup, now we are in the heart of the matter and this piece of code is the secret sauce that makes it all work.
Above you saw how we can change the Authentication policy or scheme that is called by adding the Authorize attribute. This attribute in turn calls the HttpContext.Authorize() method with the scheme or policy you specified, and if the authorization check FAILS it also rejects the API call.
Umbraco forms' headless API doesn't actually have an Authorize attribute on it. This is on purpose so that it can accept both anonymous and authenticated requests. Instead it relies on the HttpContext.User property to determine if the user is logged in. This property is auto-populated by Asp.Net automatically - but only for the default authentication provider.
So... to get Umbraco forms to recognize our users, we need to change the default policy. We can do that with the following code.
In Composers/AuthenticationComposer.cs, add:
    // This has to run as a PostConfigure to overwrite the default aspnetcore Identity provider
    // which is added by the `UmbracoBuilder.AddMembersIdentity()` extension method.
    builder.Services.PostConfigure((AuthenticationOptions options) =>
    {
        options.DefaultAuthenticateScheme = Auth0JWTExtensions.Auth0JWTBearerSchemeName;
    });
This snippet of code runs AFTER all the rest of the Umbraco setup has run, including configuring the standard Asp.Net authentication used for Members, and changes the DefaultAuthenticationScheme to our JWT scheme.
There are 5 default scheme properties available to us on the standard authentication options, but we only need to use the DefaultAuthenticateScheme. Here is what they do:
DefaultAuthenticateSchemeThe Authenticate scheme is responsible for assessing our current HttpContext and determining if we are a valid user or not, and if so, hydrating ourHttpContext.Userclaims with the relevant information. This usually involves reading a cookie, header, or JWT token and validating it.DefaultChallengeSchemeThe Challenge scheme is used to ask a user for credentials. For the Cookies scheme this normally triggers a Redirect to the login page. For basic http username / password authentication, it would respond with awww-authenticatechallenge header asking the browser for credentials.DefaultForbidSchemeThe Forbid scheme is used when if when we have a requirement and the current context indicates that there is no valid user. By default it fallsback to the Challenge scheme to ask the user for credentials, but it could also just return a 401 Unauthorized response.DefaultSignInSchemeandDefaultSignOutSchemeThe SignIn and SignOut scheme are responsible for persisting an authenticated user. For many schemes, this will involve setting and removing a cookie.
Summary
That's it! We can now make calls to any REST API that is expecting a standard Umbraco login cookie using our JWT token instead and, through the power of the AspNet Authentication stack, become recognized as a standard Umbraco member.
This technique will work for both the definitions and entries APIs. It will NOT currently work with the Content Delivery API, as that uses a different authentication mechanism.
If you want to review the code or prefer seeing a working copy, the code for this blog post is available here.